Discount Groups, Create and Apply to a Customer(s)
Create and Apply a Discount Group to a Customer(s)
This guide provides a step-by-step process for creating and applying a discount group to one or more customers. By following these instructions, users can efficiently manage additional discounts, enhance customer engagement, and improve sales processes. It simplifies the often complex task of discount management, ensuring that users can maximize their pricing effectiveness with ease. Viewing this guide will empower users to implement discounts confidently and accurately.
- Begin on our home page.

- Click "Account administration"

- Click "Discounts"

- Click "New discount group"

- Click the "Name" field and type a name for this discount group. For this example we'll use "9 PERCENT discount group"

- Typically discount groups will apply to products. To make this Discount Group selectable under customers, change the "Type' from "Cost" to "Retail".
Guideline:
Discount Groups with "Cost" can be connected under "Vendors"
Discount Groups with "Retail" can be connected within a customer's profile.

- Note the dropdown menu next to "Values" You can choose to add this addition discount to through the multiplier or discount. For this example we'll use "Discount" Be sure to click "Save"

- You have now created the Discount Group named "9 PERCENT discount group". Click on the name of the discount group to open the discount box.

- Click the ellipsis (3 dots) to import the file with discounts. The file should have the extension of .CSV (Comma Separated Values). You should be able to open and edit the .CSV file in applications like Microsoft Excel or Google sheets.
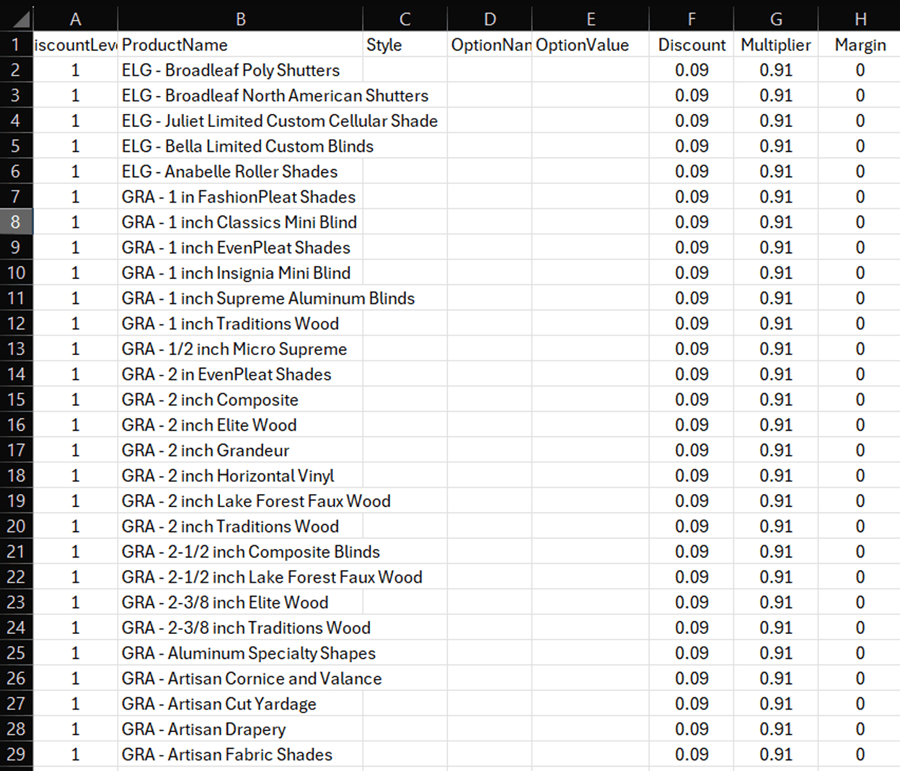
- Your new Discount Group (intended for customers) should include each product intended to receive an additional discount within this group. In this example you may notice products from 2 vendors, Elegant and Graber.
Note column F has a discount of 0.09 or 9% and Column G shows the multiplier is 0.91 or 91%. As the user, you can use either the discount or the multiplier for any type of discount group. Again, we'll use the discount for this example.
- Once you have the .CSV file ready, click "Import discounts"

- You can import/upload the .CSV file in either of two ways.
a) click "Select File" and navigate to the file on your device
b) drag the file from its folder into the box in this screen

- Once the .CSV file is selected, click "Save"

- You should see the discounts & multipliers from the .CSV files within a few moments.

- Click X to close out this box and return to the "Discount Groups" page in Focus 2.

- Select a customer to whom the Discount Group will be added.
There are two (2) available paths to add a discount group.

- Path 1 of 2:
Click the dropdown menu next to "Customer Discount Group"
Click on our new discount group "9 PERCENT discount group"

- Path 2, step 1 of 2
Click "Edit"

- Path 2, step 2 of 2
Click the dropdown menu next to "Customer Discount Group"
Click on our new discount group "9 PERCENT discount group"

- Be sure to click "Save and close"

- The customer discount from the new Discount Group (assigned to the customer) displays here on the line item configuration page.
Note: The example 9% discount will lower the price of the line item, but will not be displayed in other screens or process reports.

- The example 9% discount will not appear on this page

- The example 9% discount will not appear under adjustments.

- The example 9% discount will be applied to the total of the line item, but will not appear on the process report.

Related Articles
Managing Customer Discounts in SalesPro
Summary This article explains how Customer Discounts are created and updated in SalesPRO. More Information We will be working with Discount functions found on the Maintenance tab. General Customer discounts are the percentages that you, the user, ...
Managing Discount Groups using the NEW Inline Discounts Module
Managing Discount Groups using the NEW Inline Discounts module. Learn how to efficiently configure, update, and manage discount groups using the NEW Inline Discounts module. This guide provides a walkthrough for editing existing discounts, as well as ...
How to Create an Adjustment
How to Create an Adjustment Click the Gear icon Click "Account administration" on the dropdown menu Navigate to the menu on the left of the screen and click "Adjustments" Choose the Type of Account Adjustment You Would Like to Make Tip! These are the ...
Managing Vendor Discounts in Solatech Focus, Site Admin
Summary Site Administrators have the ability to change or add vendor discounts for any of their accounts when needed. This document explains the process of updating vendor discounts. More Information During the initial setup of your Focus site, a ...
Working with Adjustments and Promotions as an Account Admin
Summary The Solatech Adjustments and Promotions feature allows user to take advantage of Solatech supplied shipping charges and promotions for Graber, Horizons and Comfortex. An Account Administrator can also create their own custom charges and ...