Editing a Text Box
Editing a Text Box
This guide provides a step-by-step approach to editing text boxes in Report Designer, making it an essential resource for anyone looking to enhance their reports visually. It covers key formatting options such as text styling, color choices, and border applications, allowing users to create a more polished and professional appearance. By following the instructions, users can easily customize their reports to better convey information and improve readability.
- Click "Process reports"
- For this example, we created th e process report "Quote_Textbox"
- Click "Design Report" to open Report Designer.
- Note: the Properties tab is selected in the upper-right area of the screen. We will see the change we make in the top bar, will be reflected under Properties, and vice versa.
We will use "Billing Address" for this example. Double click this text box.
- This this example, let's type or paste the word "Customer's" before Billing Address.
- Click the large B icon to the text to bold font.
- Now, with the text box is still selected, let's go to the top to make change in the text. The user may click on bold or italics.
The user may also click on the letter A with the colored underscore. This will drop down a menu of colors.
- In this example we will choose to color our text red.
- This icon will add color to our designated text box.
- For this exercise, let's choose a light yellow.
Note: the chosen background color will also populate in the menu on the right, Under "BACKGROUND"
- Use these buttons to set the orientation of the text in the text box.
- To place a border around the text box (one 1 side, or all 4) Click the open fields under border. You can choose the type of border on each side. The field with the arrow that points left will apply the chosen border on the left side (only) of the text box.
- In this example, we'll choose a double border on the left side of the box.
- To apply a border to the other sides, click the "<Empty>" field next to each arrow and choose the desired border style.
In this example, we'll assign a border to the right side of the text box.
- There is no requirement to select borders for all four (4) sides.
Once the border is selected, the user may decide to experiment with other options as well.
16. It is recommended that the user click PREVIEW at the top of the screen to review. If you are pleased with your edit, click the SAVE icon (the floppy disk icon) to save your work. 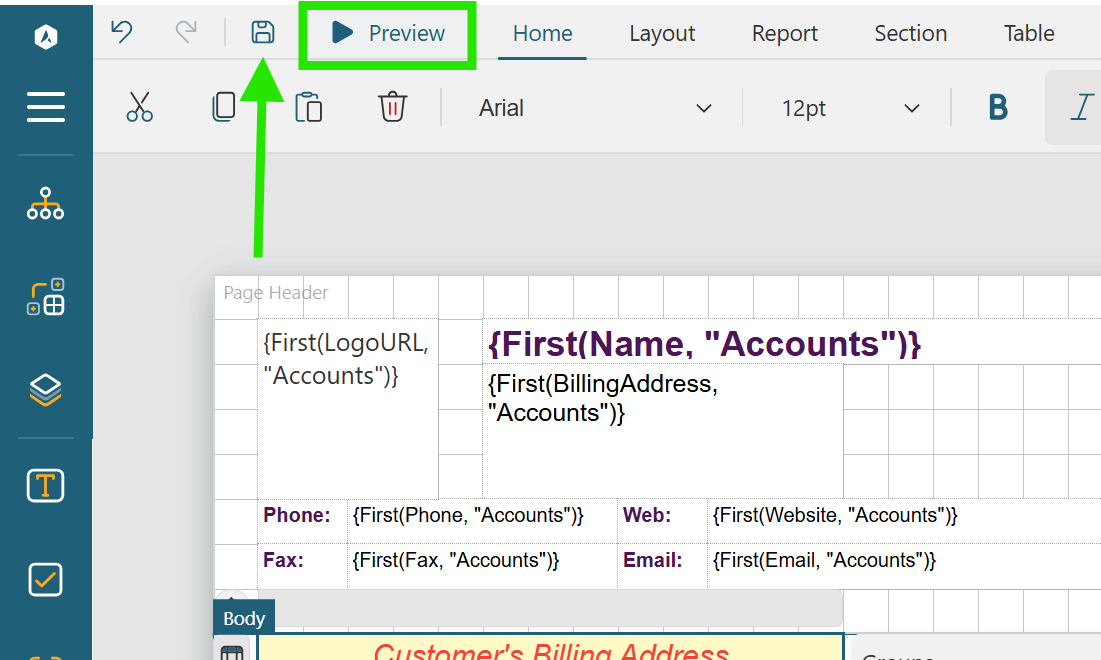
Related Articles
Adding a Product to a Quote
More Information These navigation and entry instructions may not be the only way to complete the desired task. For more in-depth explanations, any related articles will follow the instructions as links. Steps To create a line item from the ...How to use the Reset Pricing check box
Summary In Solatech Focus, users have the ability to enter a new item price or discount on a line item. When using the Replace feature, this can cause unexpected pricing results when a new product is selected. Reset Pricing removes any existing ...How to Modify Terms and Conditions on a Process Report
Summary This article will explain how to modify existing Terms and Conditions on a Process report. More Information Before modifying a report, you may want to make a backup copy, as a precaution. From the Setup tab, click on Process Reports. The ...When editing price charts in Excel, values have many numbers after decimal point
Symptoms When editing price charts in Excel the value in some of the cells has many numbers after the decimal point, instead of just two as you would expect. For example, Excel shows 550.058999741077 instead of 550.06. Cause There are two possible ...Company starts to open but then stops and returns to Open Company dialog box
Symptoms When you try to open a company it does not open. It starts the open process but then stops and returns to the Open Company dialog box. In addition, if you look in the log file swcs-xxxx (located in the same location as the SWCS4.EXE) you ...